This is a cute frog themed birthday card that I made today. This card is for my sister n law who has a birthday coming up on July 4th. She really loves gardens and frogs. I fell in love with this Cricut image and had to cut him out.
Hope you like the video. Make sure you visit my channel and subscribe.
Have a good evening.

Showing posts with label My Handmade Cards. Show all posts
Showing posts with label My Handmade Cards. Show all posts
Saturday, July 1, 2017
Thursday, January 26, 2017
[ VIDEO ] Another Masculine Birthday Card and Upcoming Coffee and Crafts Episode
Hey everyone!!!! How is everyone doing??? I have been busy. Working on mini albums, cards, all kinds of things.
The first order of business is that I am planning a live YouTube stream on Saturday February 11th about 10:00 AM EST. I will be putting together the Close To My Heart Welcome Wreath. You have to check this out.


The first order of business is that I am planning a live YouTube stream on Saturday February 11th about 10:00 AM EST. I will be putting together the Close To My Heart Welcome Wreath. You have to check this out.
For details, you can click here
You will find 4 ways to get this wreath kit at the above link. Order yours now and have it by Feb 11th. Then we can make our wreaths together.
Now for the next thing for tonight's post.... I had to make a card for my oldest son who turned 29 this past Monday. You will find the picture and video below.

Tuesday, January 3, 2017
[Video] Birthday Card For My Youngest Son
Good evening. Here is a card that I made for my son for his birthday. His birthday was New Years Eve
Friday, August 26, 2016
[ VIDEO ]50th Birthday Card
Good morning everyone.
I know it has been a while since I posted. I have just had several projects that kept me busy for a while. One of the things is a skill share class that I did. It is a free class. I made a Christmas Card. Here is the link... http://skl.sh/29g6fOc It is free for a limited time.
Now for today's card.... Video is below

Sunday, June 26, 2016
[ VIDEO ] Graduation Card
Hey everyone..... it has been almost 2 months since I last posted... ok maybe 6 weeks. Life happens.. I have just been really really busy. However, I did manage to make a card video today. I created this elegant graduation card.

The paper came from the Happy Times Paper Pack. This paper was only available in May this year. It and the matching stamp set were a special promotion for that month only. However, I do have a few packs available. The stamp sets that I used were Diploma Day and Smarty Pants.
Now, for the video..... please, if you like the video, give it a thumbs up and subscribe... Thanks
Saturday, April 16, 2016
[ VIDEO ] Birthday Card Using A Double Stencil Technique
Good morning everyone... ooops it is almost afternoon. Where did the time go?????
I played this morning in my craftroom. My other half and older step son went out to Powerline Park in St Clairsville OH for their spring open. So, they loaded up the Can Am Commander side by side and off they went for the day. Probably the only kid appropriate event at that park.

Anyhow, Here is a card that I made this morning using a technique that I learned on Stamp Nation called double stencil technique. The video is a little longer because I didn't do any speeding up of the video.

Products Used:
Tsukineko Full-Size StazOn Multi-Surface Inkpad, Timber Brown
CTMH White Daisy Ink
Craft Card Stock
White Ribbon
Upcoming CTMH Stanp of The Month for May 2016
Versamark Ink
Ranger White Embossing Powder
Tsukineko Full-Size StazOn Multi-Surface Inkpad, Timber Brown
Here is the video
Thursday, April 14, 2016
Brand New Card Kit Now Available
Greetings fellow crafters... I just completed my new card kit that is now available for purchase. Below you will find a pic of the cards and a video at the end of the post.


Included in this kit
- 4 Card Bases
- 4 Envelopes
- 1 Piece of 6 x 6 Double Sided Pattern Paper
- 1 Piece of 3 1/4 x 5 Double Sided Pattern Paper
- 1 Piece of Solid Colored Card Stock
- 1 Piece of CTMH Extra Thick Baker's Twine
- Complete Cutting and Instruction Guide (will be emailed to you after purchase)
Not Included
Feel free to use your own stamp sets and supplies. This kit is designed to give you the freedom to customize your cards. However, if you would like to purchase any of the stamps, ink or adhesives, I have linked to them above.
To Purchase:
$9.95 + $3.00 Shipping and Handling
Close To My Heart and Stampin Up Consultants. I will sell just the cutting guide and instructions to you. Email me and I will send you an invoice via PayPal. In your email, please include your shopping website so that I can verify that you are an active consultant.
Consultant Price is $7.00. I will also send you the terms in which you may use my guide. It includes the obvious... can't sell or distribute in whole or part, no modifications to the document etc.
Tuesday, April 12, 2016
Mother's Day Card Waxed Paper Emboss Resist Technique
Good morning...
I wanted to share a card that I just finished this morning. I got my inspiration from a post on Stamp Nation, which I just joined a couple days ago.

I sort of CASED Dawn Turley's Happy Birthday card. The technique is fairly easy. She mentioned a YouTube video from GinaK on using waxed paper for an emboss resist technique. I loved Dawn's card so much that I had to make one too. Here is the GinaK's YouTube Video . I followed her instructions.
Then I stamped the sentiment of white daisy card stock and did a dove tail cut to create the banner.
I also used my Zutter Bow It All 2.0 to make the bow.
This post contains Amazon Affiliate Links and I may earn a small commission.
I wanted to share a card that I just finished this morning. I got my inspiration from a post on Stamp Nation, which I just joined a couple days ago.

I sort of CASED Dawn Turley's Happy Birthday card. The technique is fairly easy. She mentioned a YouTube video from GinaK on using waxed paper for an emboss resist technique. I loved Dawn's card so much that I had to make one too. Here is the GinaK's YouTube Video . I followed her instructions.
Then I stamped the sentiment of white daisy card stock and did a dove tail cut to create the banner.
I also used my Zutter Bow It All 2.0 to make the bow.
Materials Used:
- White Daisy Card Stock
- Black Card Stock
- White Daisy Card Base
- Cotton Candy Ink Pad
- Black Archival Ink
- Sept 2015 CTMH Stamp of The Month (Retired)
- Charming Cascades CTMH Stamp Set
- Black Ribbon
- Zutter Bow-It-All, V2.0
- MISTI Stamping Tool
- Cuttlebug 5"X7" Embossing Folder/Border Set-Anna Griffin Rose Pavilion
This post contains Amazon Affiliate Links and I may earn a small commission.
Thursday, April 7, 2016
[ VIDEO ] 3 x 3 Note Cards and Envelopes and Box
Good afternoon everyone...
Being off work because of my knee surgery has really given me time to craft. I am pumping out the videos like mad. Geeeeee I may spoil you, huh.
Any who.... here are a couple sets of note cards with envelopes and a cute box to put them in.

Dimensions:
Note Cards: paper cut 3 x 6 scored at 3"
Envelopes: paper cut 5 1/4 x 5 1/4 scored at 5/8 on envelope punch board
Box 5 1/2 x 11 scored on short sides at 1" and on one long side at 3 1/2, 4 1/2. 8 and 9"
The video will be below.... but first, the products that I used in this video (box on right) ....
Kraft Card Stock
Black Archival Ink
Spring Time Wishes Stamp Set
Spring Time Wishes Die Set (No longer available)
Misti stamping tool
We R Memory Keepers Envelope Punch Board
Tombow Glue
Scor-Tape
Shinhan Twin Touch Markers Click the link and scroll down a little
Saturday, March 26, 2016
Happy Birthday Card With Partial Die Cutting
Good morning everyone...
I wanted to share this cute card that I made this morning. It is a Z fold card with a partial die cutting technique that I learned from Jennifer McGuire on YouTube. I did not record a video of this since it was my first try at it and I did mess it up and had to start again. I was on the phone and doing this and the first card, I cut one of the flowers on the wrong side of the fold.


I wanted to share this cute card that I made this morning. It is a Z fold card with a partial die cutting technique that I learned from Jennifer McGuire on YouTube. I did not record a video of this since it was my first try at it and I did mess it up and had to start again. I was on the phone and doing this and the first card, I cut one of the flowers on the wrong side of the fold.

Here is what I did
First, I used one of CTMH white daisy card bases. I lined it up on my desk mat and put a very light pencil line down the middle of the front of the card.
I used one of our Spring Time Wishes thin cut dies (sold out) and layed them half way across my pencil mark. Taped the die in place. When I ran it through my Big Shot, I only put the top plate over the right side of the card front. That gave me a partial cut.
I erased my pencil lines. I stamped the partial die cuts with the matching stamp set, SpringTime Wishes with our black archival ink. being careful to line up the stamp on the cut. I used clear embossing powder and heat embossed. This was to insure that when I colored the images, the ink would not run and stay in the lines.
I colored the flowers using Designing With Gelatos Colors Kit- , The inside I used a piece of Confetti Wishes (retired) paper from my little sample package of B & T paper that was on a ring. The sample paper was large enough to avoid the hole and I was able to cut to size. On top of that I used White Daisy to write a sentiment. I inked the white paper with Pacifica ink.
The Happy Birthday Sentiment, I stamped 3 times along the outside edge using Just To Say Stamp set from the Cricut Collection. NOTE: only available in this stamp set. Used Pacifica, Thistle and Honey inks.
I felt it needed a little more on the front. Seemed plain. I took white sequins from the Coral Reef pack (discounted right now - get them while they are still available) and used Pacifica Shinhan Twin Tip Marker (this color is no longer available) and colored the sequins to match the card. Then used Bitty Sparkles in the centers.
I almost forgot, I took a piece of that Confetti Wishes paper and put it on the inside of the Z fold behind the flowers to cover up an oopsie when I got some ink on that panel.

This is the inside of the card. And there you have it. If you are interested in any of the products used, just click the links in my instructions or go to my Close To My Heart Store.
This post does contain an Amazon Affiliate Link which I may earn a small commission
Monday, March 21, 2016
[Video] Happy Birthday Card Using Seaside Paper
Good Morning.
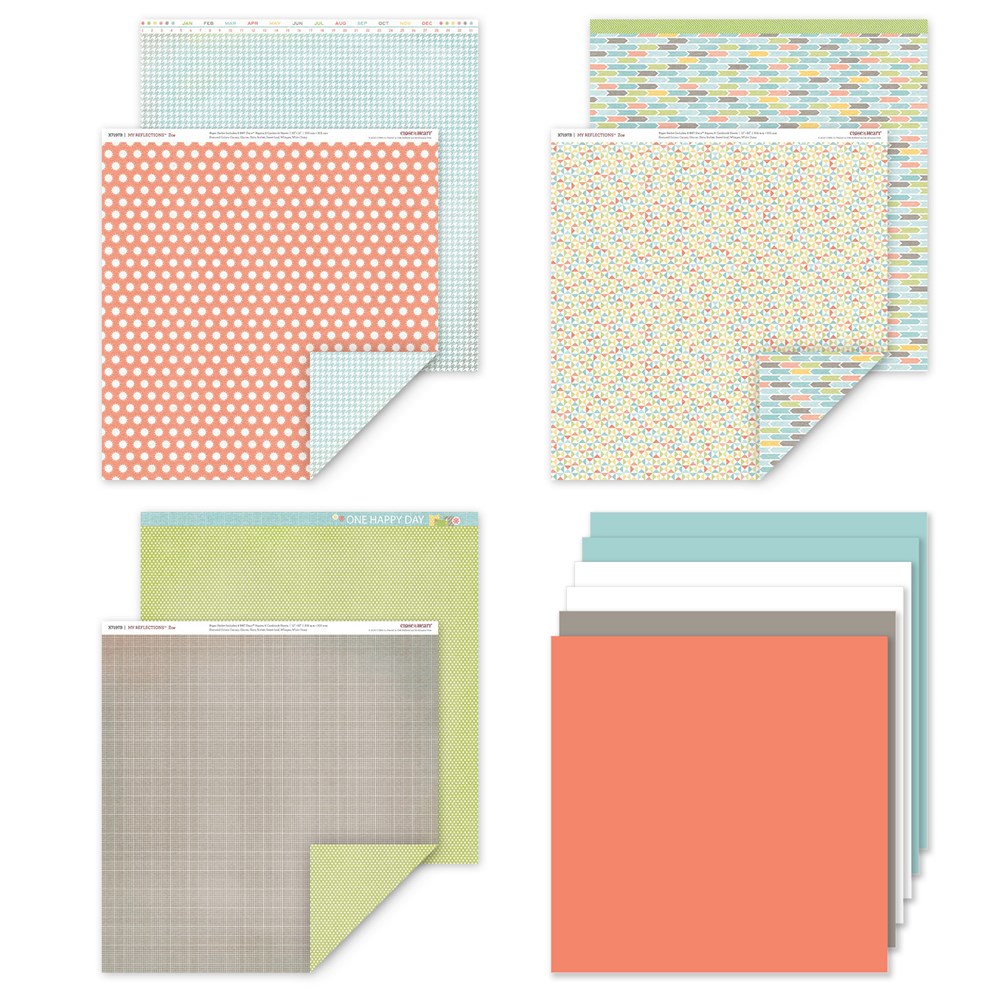
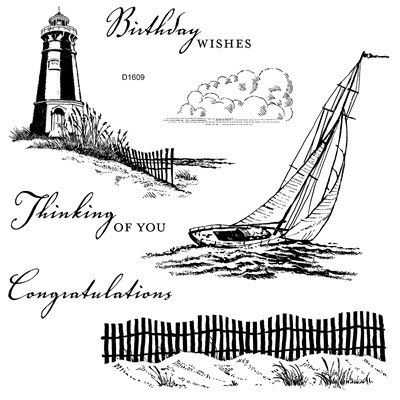
I just uploaded a video of making a birthday card using a retired paper pack which I have a ton of... Seaside B & T paper pack. I had gotten the bulk pack last year and it has been sitting in my collection. I have only used a couple sheets so far. I wanted to use something from my stash. I have so much of this paper that if you are interested in any of it, I will sell it for $1 per sheet plus flat rate shipping, no matter how many sheets you want. Just send me an email.

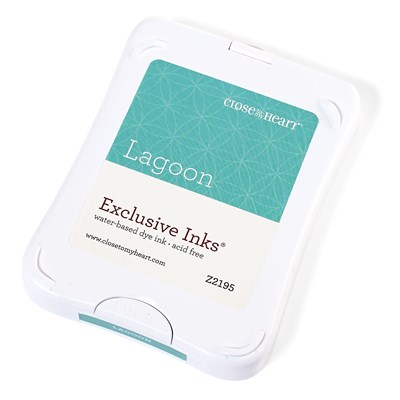
What I forgot to mention in the video is that I used the Lagoon Ink to ink up the edges of my card pieces.
Products Used:
Seaside Paper Collection (Retired)
Happy Birthday Sentiment (Retired - was the Stamp of the Month April 2015)
1 1/2" Circle Punch
2" Scallop Circle Punch
I just uploaded a video of making a birthday card using a retired paper pack which I have a ton of... Seaside B & T paper pack. I had gotten the bulk pack last year and it has been sitting in my collection. I have only used a couple sheets so far. I wanted to use something from my stash. I have so much of this paper that if you are interested in any of it, I will sell it for $1 per sheet plus flat rate shipping, no matter how many sheets you want. Just send me an email.

What I forgot to mention in the video is that I used the Lagoon Ink to ink up the edges of my card pieces.
Products Used:
Seaside Paper Collection (Retired)
Happy Birthday Sentiment (Retired - was the Stamp of the Month April 2015)
1 1/2" Circle Punch
2" Scallop Circle Punch
Entered into the following Challenges
Sunday, March 13, 2016
[Video] Monoprinted or Gelli Printing and Thinking of You CardWood
Good morning everyone!!!! Wake up and smell the coffee now that the clocks have moved an hour ahead and loosing an hour sleep... YAWN!!
After recording this, I decided to try using inks while off camera. Here is a print that I came up with. The inks didn't work as well because they were fast drying. You need slower drying ink like pigment ink. I ended up having to touch up the background and the stamped plants. I added the sentiment afterwards.

Products that I used were the Close To My Heart Inks
Also used The Stamp of the Month for January 2016
What have I been up to??? Playing with gelli printing on my homemade gelli plate and an acrylic cutting mat. I recorded a video of my very first experience in this art form. I have seen so many artists using this form of printing in art journaling. I decided I wanted to give it a try.
After the video is a picture of a card that I made using this technique but with inks instead of paints. The inks and stamp sets are from Close To My Heart.
 |
| Here is my homemade gelli plate |
After recording this, I decided to try using inks while off camera. Here is a print that I came up with. The inks didn't work as well because they were fast drying. You need slower drying ink like pigment ink. I ended up having to touch up the background and the stamped plants. I added the sentiment afterwards.

Products that I used were the Close To My Heart Inks
 |
| Sapphire Z2648 |
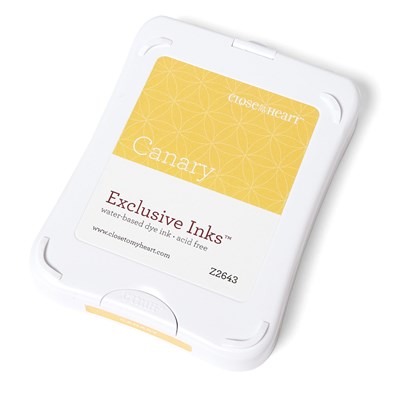 |
| Canary Z2643 |
 |
| Sunset Z2191 |
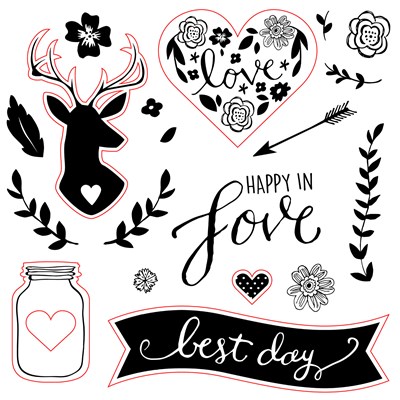 |
| Woodland Romance Stamp Set D1683 |
Saturday, February 6, 2016
February Stamp of the Month Birthday Card

Good afternoon everyone. I wanted to share this cute card that I made this morning. It features the Close To My Heart stamp of the month for this month... it is Balloon Animals. I think this stamp set is just the cutest. It retails for $17.95 but when you spend $50 you can purchase this set for $5. However, this set is only available until. the end of the month then it will be gone.

Here is a list of Products Used:
S1602 Stamp of the Month for Feb 2016
X7199B Sangria B & T Paper Pack
White Daisy Card Stock
White Daisy Card Base and Envelopes
Z1935 Epoxy Bubbles
Inks: New England Ivy, Sapphire, Sorbet, Cocoa
Saturday, January 30, 2016
VIDEO: Masculine Birthday Card Using CTMH Urban Background and Texture Paper Pack
Good Saturday everyone!!!
I am here today with another card that I made. I meant to post this last weekend but had gotten busy. This card was made for my brother n law who just celebrated his birthday yesterday. It was a very quick and easy card.

Here are the products that I used to create this card.
Z1928 Durable Triangle Studs
Z1921 Neutral Metallic Bakers Twine
B1419 Joyful Birthday Occasions Stamp Set
Stamp set from Blossom Workshop On The Go (Retired)
X7204B Urban Background and Texture Paper Pack
Inks: Z2111 Chocolate and Z2164 Sorbet
Here is the YouTube video
Wednesday, January 6, 2016
VIDEO: Jan 2014 Close To My Heart Stamp of The Month Valentines Day Gatefold Card
Hello everyone....
I finally got to record my video and edit it. I used the Close To My Heart January 2014 Stamp of the Month Beloved Bouquet. I love this set and just had to create with it. This set will only be available until Jan 31. It is a D size stamp set for $17.95 or if you spend $50 or more you can get it for only $5/
I made this Valentine's Day Card using this awesome yummy stamp set.
I will be entering this card into a few challenges:
Crafty Sentiment Designs W, 1E, SIO - Anything Goes
Creative Card Crew 2W - #103 Anything Goes (week 3)
Lemon Shortbread 2W, E3, no digital projects Always Anything Goes (Week 1)
Through The Craft Room Door W, 2E - Always Anything Goes
Card Base 8 1/2 x 5 1/2 Black Card Stock - Scored on both long sides at 2 1/8
Base Panels 5 1/4 x 1 7/8 in White Daisy
Top Panel Layers 5 1/8 x 1 3/4 using Sangria Paper Pack
Black Circle cut on Cricut Explorer 2 1/2
White Circle for the Rose also cut on the Cricut Explorer 2 1/4
Black Rectangle for sentiment... 2 1/2 x 1 1/8
White Rectangle for sentiment... 2 1/2 x 1 1/8
Inside Panel 4 x 5 1/4
Inks used: Cranberry and Fern

I finally got to record my video and edit it. I used the Close To My Heart January 2014 Stamp of the Month Beloved Bouquet. I love this set and just had to create with it. This set will only be available until Jan 31. It is a D size stamp set for $17.95 or if you spend $50 or more you can get it for only $5/
I made this Valentine's Day Card using this awesome yummy stamp set.
 |
| This is the outside of the card |
 |
| Here is the inside |
Crafty Sentiment Designs W, 1E, SIO - Anything Goes
Creative Card Crew 2W - #103 Anything Goes (week 3)
Lemon Shortbread 2W, E3, no digital projects Always Anything Goes (Week 1)
Through The Craft Room Door W, 2E - Always Anything Goes
Here are the dimensions of the cuts on this card.
Card Base 8 1/2 x 5 1/2 Black Card Stock - Scored on both long sides at 2 1/8
Base Panels 5 1/4 x 1 7/8 in White Daisy
Top Panel Layers 5 1/8 x 1 3/4 using Sangria Paper Pack
Black Circle cut on Cricut Explorer 2 1/2
White Circle for the Rose also cut on the Cricut Explorer 2 1/4
Black Rectangle for sentiment... 2 1/2 x 1 1/8
White Rectangle for sentiment... 2 1/2 x 1 1/8
Inside Panel 4 x 5 1/4
Inks used: Cranberry and Fern

Tuesday, December 15, 2015
Christmas Card Created on My Explore Used Print Then Cut
Good morning...
Here is a quick post before I have to head off to work. uggggg wish I could stay home and play in my craft room.
I cut this card out on my Cricut Explore and I took advantage of the print then cut feature. I have to admit that I got this idea from a YouTube video I saw and had to make one myself.

Here is a quick post before I have to head off to work. uggggg wish I could stay home and play in my craft room.
I cut this card out on my Cricut Explore and I took advantage of the print then cut feature. I have to admit that I got this idea from a YouTube video I saw and had to make one myself.

I was pretty happy with the way that it turned out.
I am entering this into the following Challenges:
Saturday, December 5, 2015
Close To My Heart White Pines Cardmaking Workshop On The Go
Good morning everyone... I am here to bring you 3 new videos demostrating how to assemble the Close To My Heart White Pines Cardmaking Workshop On The Go. The first video is a tad long... but worth the watch.

****************************************
Products Used:
White Pines Cardmaking Workshop On The Go - G1099
http://paperthisandthat.ctmh.com/Retail/Product.aspx?ItemID=8719
Inks: http://paperthisandthat.ctmh.com/Retail/Products.aspx?CatalogID=49
Black 44751
Cranberry Z2116
Fern Z2650
Cashmere Z2175
****************************************

****************************************
Products Used:
White Pines Cardmaking Workshop On The Go - G1099
http://paperthisandthat.ctmh.com/Retail/Product.aspx?ItemID=8719
Inks: http://paperthisandthat.ctmh.com/Retail/Products.aspx?CatalogID=49
Black 44751
Cranberry Z2116
Fern Z2650
Cashmere Z2175
****************************************
Saturday, November 7, 2015
Birthday Card For A Friend
Good evening everyone. I have been a little busy the past couple weeks. Sorry that I haven't been around. But anyhow, I made a card this afternoon for a friend of mine who is celebrating her birthday. Video is at the end of this post.

Products used:


Products used:
The sparkle flourish is retired
The ribbon in the bow was from JoAnn's
other gems were from either Michaels or JoAnn's
Sunday, October 18, 2015
Card Shares
Hey everyone.....
I just wanted to share come cards that I made this past week. I had a lot going on and didn't get to record videos on these.
The first card I made for my step son. He needed some invitations made for his birthday party. I used a stamp set from Close To My Heart that is exclusive to the Art Philosophy Cartridge. I stamped the cupcake, the sentiment and on the inside the date time RSVP Etc. all from the same stamp set. I had Adrian color the cupcake with our Shinhan Twin Tip Markers. He picked out the color scheme and paper.


The next card I made for my mother's birthday. I used paper from my stash and I had all these layout plans but changed them because the paper was too pretty to cover up. The Label was created using coordinating cuts and stamps from Artfully Sent Cricut Cartridge by Close To My Heart The inside leaf is from the the same Art Philosophy Cartridge that the previous card used.


Tuesday, October 13, 2015
Easy Halloween Card
Here is a Halloween card that I made. It was pretty easy to put together
Products Used:
Close To My Heart Slate Ink Z2173
Close To My Heart Sparkles Assortment Z1752
Shinhan Twin Tip Marker Warm Grey 7 Z2468
Products Used:
Close To My Heart Slate Ink Z2173
Close To My Heart Sparkles Assortment Z1752
Shinhan Twin Tip Marker Warm Grey 7 Z2468
Subscribe to:
Posts (Atom)