Good morning.
Hope everyone had a happy Easter. I just wanted to share this mini album that I finished up this past week. I started it way back before Halloween but didn't get around to finishing it. But since I have time on my hands as I recover from knee surgery, I am finishing some projects that I started but have yet to complete.
This album is for sale in my Etsy Store

Monday, March 28, 2016


Saturday, March 26, 2016
Happy Birthday Card With Partial Die Cutting
Good morning everyone...
I wanted to share this cute card that I made this morning. It is a Z fold card with a partial die cutting technique that I learned from Jennifer McGuire on YouTube. I did not record a video of this since it was my first try at it and I did mess it up and had to start again. I was on the phone and doing this and the first card, I cut one of the flowers on the wrong side of the fold.


I wanted to share this cute card that I made this morning. It is a Z fold card with a partial die cutting technique that I learned from Jennifer McGuire on YouTube. I did not record a video of this since it was my first try at it and I did mess it up and had to start again. I was on the phone and doing this and the first card, I cut one of the flowers on the wrong side of the fold.

Here is what I did
First, I used one of CTMH white daisy card bases. I lined it up on my desk mat and put a very light pencil line down the middle of the front of the card.
I used one of our Spring Time Wishes thin cut dies (sold out) and layed them half way across my pencil mark. Taped the die in place. When I ran it through my Big Shot, I only put the top plate over the right side of the card front. That gave me a partial cut.
I erased my pencil lines. I stamped the partial die cuts with the matching stamp set, SpringTime Wishes with our black archival ink. being careful to line up the stamp on the cut. I used clear embossing powder and heat embossed. This was to insure that when I colored the images, the ink would not run and stay in the lines.
I colored the flowers using Designing With Gelatos Colors Kit- , The inside I used a piece of Confetti Wishes (retired) paper from my little sample package of B & T paper that was on a ring. The sample paper was large enough to avoid the hole and I was able to cut to size. On top of that I used White Daisy to write a sentiment. I inked the white paper with Pacifica ink.
, The inside I used a piece of Confetti Wishes (retired) paper from my little sample package of B & T paper that was on a ring. The sample paper was large enough to avoid the hole and I was able to cut to size. On top of that I used White Daisy to write a sentiment. I inked the white paper with Pacifica ink.
The Happy Birthday Sentiment, I stamped 3 times along the outside edge using Just To Say Stamp set from the Cricut Collection. NOTE: only available in this stamp set. Used Pacifica, Thistle and Honey inks.
I felt it needed a little more on the front. Seemed plain. I took white sequins from the Coral Reef pack (discounted right now - get them while they are still available) and used Pacifica Shinhan Twin Tip Marker (this color is no longer available) and colored the sequins to match the card. Then used Bitty Sparkles in the centers.
I almost forgot, I took a piece of that Confetti Wishes paper and put it on the inside of the Z fold behind the flowers to cover up an oopsie when I got some ink on that panel.

This is the inside of the card. And there you have it. If you are interested in any of the products used, just click the links in my instructions or go to my Close To My Heart Store.
This post does contain an Amazon Affiliate Link which I may earn a small commission
Tuesday, March 22, 2016
[Video] No Cutting Easy Gift Box
Good Afternoon,
Miracles do happen. Posting 2 days in a row LOL! Hey, I found this fantastic project from a Stampin Up Demonstrator on YouTube. She did a video on this cute gift box almost 3 years ago. Her YouTube channel is Stamping T. So, I decided to also do a video to bring it back again.

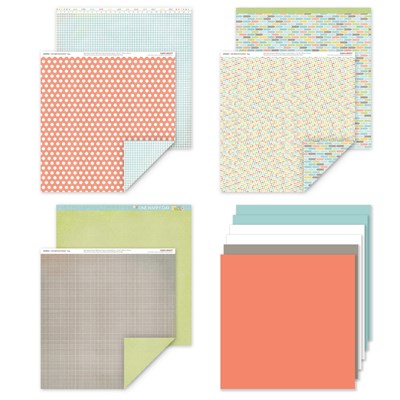
It is really easy once you make a couple. In my video below, it was my third attempt. My second was a flop because I taped in the wrong places. In the picture above, I used a retired paper pack called Taste of Summer. It was out for only a month last May. Close To My Heart had it and a matching stamp set for the month of May 2015 only. I had bought a couple packs and the stamps.
You will need a 12 x 12 piece of designer paper and a 10 inch long piece for the belly band. The width can be whatever your heart desires. I cut mine for both boxes I made at 1 1/2" wide. You will also need scor-tape and whatever embellishments you want to decorate your box with.
Here are the scoring instructions. I did put them on the screen in the video but sometimes it is helpful to have them in print as well.
Start off with placing your paper with the outside of the box facing down on your score board.
On one side score at 1 1/2" , 3" and 3 3/4". Turn paper 180 degrees and repeat
Turn paper 90 degrees and score at 3" and 4 1/2", Turn again 180 degrees and repeat.
I am entering this into the Heart2Heart Retired Challenge.
Here are some of the products I used:

Miracles do happen. Posting 2 days in a row LOL! Hey, I found this fantastic project from a Stampin Up Demonstrator on YouTube. She did a video on this cute gift box almost 3 years ago. Her YouTube channel is Stamping T. So, I decided to also do a video to bring it back again.

It is really easy once you make a couple. In my video below, it was my third attempt. My second was a flop because I taped in the wrong places. In the picture above, I used a retired paper pack called Taste of Summer. It was out for only a month last May. Close To My Heart had it and a matching stamp set for the month of May 2015 only. I had bought a couple packs and the stamps.
You will need a 12 x 12 piece of designer paper and a 10 inch long piece for the belly band. The width can be whatever your heart desires. I cut mine for both boxes I made at 1 1/2" wide. You will also need scor-tape and whatever embellishments you want to decorate your box with.
Here are the scoring instructions. I did put them on the screen in the video but sometimes it is helpful to have them in print as well.
Start off with placing your paper with the outside of the box facing down on your score board.
On one side score at 1 1/2" , 3" and 3 3/4". Turn paper 180 degrees and repeat
Turn paper 90 degrees and score at 3" and 4 1/2", Turn again 180 degrees and repeat.
I am entering this into the Heart2Heart Retired Challenge.
Here are some of the products I used:
Taste of Summer B & T Paper - Reitred
Scor-Tape
Subscribe to:
Posts (Atom)